


Okay guys I am sorry I have been such a sucky blogger lately! I ended up sticking with my alterations job...when I went to talk to the owner of the shop, she asked if I would try to stick it out if she made it so I only had to go once or twice a week, and I agreed, and I am really loving it! But between that and homeschooling and helping my sisters get ready for homecoming last week...I just have been a really aweful blogger! So, so very sorry to those of you that were waiting on this post! But, here it goes...finally! ; )
Find part 1 and the skirt pattern here
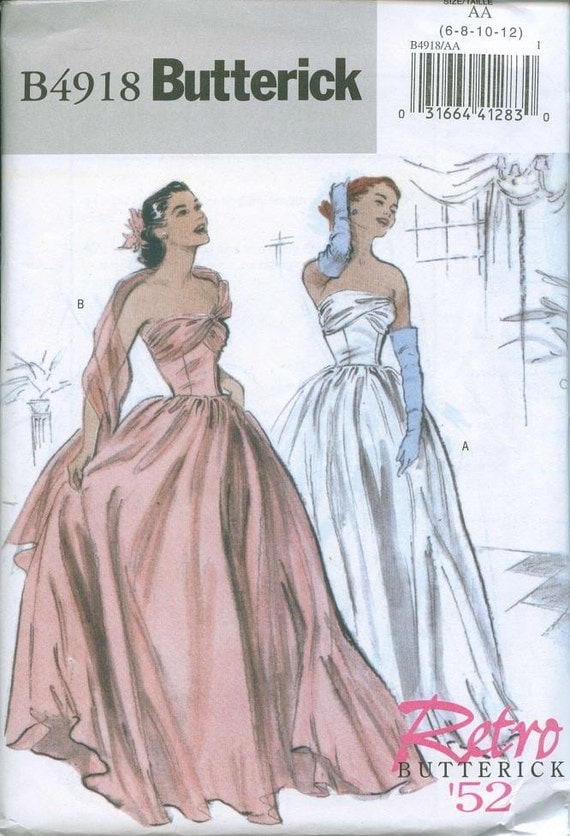
I am using Butterick 4918 for the bodice because of it's lined, boned bodice...not to mention I already had it in my stash, but any strapless dress pattern you have will work as long as the bodice is a separate pattern piece from the skirt. (I linked to ebay, but you should be able to find this pattern anywhere butterick patterns are sold...it's a reprint of one of their vintage patterns.) If the pattern you are using doesn't have a lining, just cut out two bodices.
I am going to walk through what I did, but if you are using a different pattern and have questions, feel free to email me or leave a comment, and I will do my best to help you.

You will need pieces 1, 2, 7, and 8. According to my measurements, for this pattern, I am an 6 in the bust and a 12 in the waist, so to keep from having to do a ton of taking in, I folded the pattern piece so that the top is a size 6 and the waist is a size 12.

Like this...

I wanted the waist to be lower so I cut my pieces about 2" longer and kicked them out a bit to account for my hips...

I only did this on the side pieces, not the center front and center back bodice pieces...this way the seams should lay straight when it's worn.

Now remember I mentioned that you should use a higher quality broadcloth? Here's why...see how you can see through all the pieces except the front bodice piece?? That's because my local Joann's is the only place that carries thicker broadcloths and they are closing and had none left, so I had to buy the cheaper stuff, so now I am having to double it up...major pain!!! I only did it for the actual bodice...This is the lining piece so I wasn't worried about it, but I had cut an extra front so I just went ahead and added it so you could see the difference...

After that just construct the top according to the pattern instructions...here's a few tips...
When you sew the side front pieces to the center front piece, sew them with the side pieces down because the side pieces will lay flat once pinned but the center front will not...

See the pucker? If this piece is on top you can adjust the fabric to make sure you don't get any puckers in your seam...fyi...same goes when you are sewing a sleeve or anything else that has a curve...make sure to put the pattern piece that stays flat on the bottom, so you can adjust the fabric and keep from getting puckered seams.

Once you have it all sewn together, it should look like this...

Before I add the boning to the lining, I press the seam allowance up, and cut them that length, not the length of the entire seam as the pattern tells you to do.

Also when you put the boning in the bust, make sure you are pushing it out and pull the fabric taught when you are stitching to prevent puckering.

I also like to flip it over and check to make sure the seam is smooth.

Then, use a zipper or piping foot to stitch the boning to the lining. I think a piping foot works best because a zipper foot has that little lip that the zipper passes under and my boning casing kept getting caught on it.
Next up...painting the wings!
I had someone who was supposed to do a tutorial, but I haven't heard anything, so I am going to get my grandma to give me some tips and I will get the post up asap so we can start knocking out those wings!!!
Go here for the next post in this series.
2 comments:
Oh! My! I can't wait to see how this goes...
You know I love the dress, right? But I don't really have 25K to drop on it, so once again... I will live vicariously through your sewing skills... :D
I think this is one of the most beautiful dresses ever, I can't wait to see your version.
Post a Comment
Thanks for stopping by! I love hearing from you. I read and apprieciate each of your comments. Please make sure your email is enabled so that I can respond to your comments. ♥