Annoucement: I recently made a biggggg mistake and managed to delete all of my blog photos. I am working to get them all back up asap. Please bear with me, and if you have any questions on tutorials, please feel free to email me and I will try to help you out as best as I can...Thanks!
Showing posts with label Fashion and Flair Fridays. Show all posts

Tuesday, November 1, 2011

Butterfly Dress ~ Finished!!


Sorry it's taken me so long to post this pic.  I have literally been non stop since last Friday, and now I am sick!  Yuck!  But I had to post this pic since I am finally getting a chance to sit down on the computer.  

Overall, I am happy with it.  I really wish I had been able to drape the bodice with a wing but 
oh, well....it is what it is.  I'm glad I did it.  I learned a lot and it was really fun to make!  Now I am going to get some rest, and hopefully I'll feel better tomorrow!


Thursday, October 27, 2011

Finishing the Butterfly Dress


So like a dope I somehow deleted the pics I took of me inserting the zipper...but luckily, I found this great tutorial, and this is exactly how I did it.  Before inserting the zipper, you will need to sew the skirt to the bodice...also deleted those pics, but it's pretty basic just put the right sides together, and stitch.  If you need help, just email me and I will take some pics with scrap fabric to give you an example.  Anywho, here's the tutorial for the zipper:


The wings should overlap like this in the back once you install the zipper.  If you have trouble with them not staying closed, you could add a hook and eye or snap.

Now you just have to stitch the feather trim on and your done!!!  Woohoo!   I've got mine all done and I will be wearing it to a party tomorrow.  I'm going to take pics and post them Saturday!

Wednesday, October 26, 2011

Fashion & Flair Friday ~ Monarch Butterfly Dress, Finishing the Skirt

Well, there really isn't a whole lot to it.  Once you've made the underskirt, safety pin it to either a dress form or yourself and just start pinning the wings on.

I really don't have much advise, except start in the back one one side of your opening (you'll sew this opening together later) and work your way around to the other side one wing at a time (you would work from left to right, start in one of the white sections, then end at the other)....And if you are wondering why my lining is black and white, its because, as I mentioned on FB, I wanted it to be more full, so instead of going out and buying more netting, I decided to hack some more fabric off the bridesmaids dress I used to make my sisters Marilyn Dress.  I figured, a) it's already lined, and b) it's FREE!!!  Can't beat it!

Anywho, isn't it sad looking now!  I'm fairly certain I can salvage what's left of the top and make something...already got a few ideas rolling around in this crazy little head of mine...as for when it will get done...that's going to be a whole nother story!!! lol


Moving on...

Here's how mine ended up looking.  I only used four of my six wings.  My only advice is work your way around and play with the positioning.  Typically, I pinned each wing at three spots:  dead center (between the top and bottom portion of the wing) and then a little to the left and a little to the right, depending on how much I needed to lift the wing.  

In some spots, I even had to sort of fold pieces up towards the waist to get the look I wanted, and keep the wing from looking bunched up.


Oh, btw, please excuse my horribly filthy mirror...guess I could've windex-ed before using it to take pics, huh.  ; )

You can see in these pics in some spots it sort of stuck up over the waist, don't worry about that.  We'll just cut it off once it's sewn together...no biggie.  Just maneuver them however you need to get the look you want. 

Here's a nice blurry view of my behind...but I wanted you to see how the wings sort of overlap in the back to close off the skirt....that's what you're going for.

Oh, and  if you're like me with no dress form and have to pin the skirt to yourself, here's a few tips...

1)  Do NOT bend over to pick up a pin you've dropped!  
2)  Pin sideways!!!
3)  DO NOT BEND OVER TO PICK UP A PIN YOU'VE DROPPED!!!!!!!

Trust me!  It's nothin' nice!

Once you take it off, pin it in place well.  Make sure you leave 1/2" on either side so that you can sew the zipper on without sewing it to the lining....If you look closely at either side you can see the little bit of lining sticking out.

Like so...

Set your stitch to about 5mm long, turn it over so that you can see the edge of the lining and stitch the wings to the lining with a half inch seam allowance.  Once they are stitched together trim off the excess wings.  (that black part that's sticking out the top), and you're done!...for now

If you're wanting to move ahead, all that's left is to pin the skirt to the bodice RS facing and stitch.  Insert the zipper according to the zipper/pattern's instructions, and hand stitch the feather trim to the bodice!  Then, you will be completely done!!!  Woohoo!  

I will the instructions with pics tomorrow night.  Email me if you have questions!!!

Sunday, October 23, 2011

Fashion & Flair Friday ~ Monarch Butterfly Dress, Making the Underskirt

At first, I was really excited about this fabric, but once I had it draped on the bodice, I just didn't care for the way it went with {or rather, didn't go with} the skirt, so I scrapped that idea, ripped it off, and just left the bodice black.  If I had had time, I was going to drape it in a black chiffon like in the draping tutorial I posted, but I ran out of time {or so I thought, but I actually could have done it since I ended up not finishing for the party because I didn't like the way the skirt was hanging, but I already stitched the bodice to the lining and no way I am taking it apart again, so I will just have settle on plain black sans draping.  Oh well, at least the feather trim will perk it up a little so it won't look so boring!}

For the underskirt, I used tulle, but in the end, the paint added so much weight that the tulle just didn't poof it out enough for my liking, so I am going to add some netting to mine to poof it out more.

So here's what I did:

Cut List:

Broadcloth:  8" x width of fabric
Tulle or Netting:  8 - 8" x WOF
                                4 - 15.5" x WOF

Gather the 8 - 8" x WOF tulle/netting strips together until they are the same width as your broadcloth.  I used a gathering foot, and when I would come to the end of on strip (about 1/2" left), I would just lift my presser foot and overlap the beginning of the next strip, but even if you don't have a gathering foot, you can do the same as you are sewing your gathering stitch across the top edge

Pin the tulle to the broadcloth and stitch using a 1/2" seam allowance.

Finish the raw edge, then press the seam up toward the broadcloth.

Now gather the 15.5" strips, just like you did for the 8" strips, and pin them to the top edge of the broadcloth and stitch.

Now all that's left is to drape the wings on the skirt...which I have found to be a little tricky to get them to look right, but my Grandma is going to come over and help me drape them, since I don't have a dress form and will have to pin the skirt onto myself, then, drape the wings onto the skirt. I will post how I drape them as soon as we get them done.  Then, we will just have to sew the skirt to the bodice and add the zipper and feathers!  Yay!

Monday, October 17, 2011

When you take advice from Tim Gunn....{more on the butterfly dress bodice}

OMG!   I am soooo excited!  If you read this post, you were like me and thinking "Great!  The bodice is going to be boring!"  Well, funny how God works things out because I was trying to figure out how to get the wings to not look wrinkly {from being so stiff from the paint} when they hang as the skirt, so I figured I would make a little pettiskirt under it...not the big fluffy ones little girls wear, just a simple pettiskirt like under wedding dresses and stuff.

So, there I was at Wal-Mart getting my tulle cut (btw:  you can use black netting...it's found right by the tulle, it's cheaper, and stiffer, and you will have to use less, but I figured if it happened to peak through my wings black shimmer tulle would look much prettier)  Anyway, I am waiting for the lady to cut my tulle and right behind her is the {almost} perfect match to the red orange of my wings! And it's not a solid!  It sorts of looks like, I don't know, muddled, like brush strokes or something.  I was so excited, I snatched it up had her cut a yard and that was that!


What do you think???  I think it's close enough...I mean, it has a white background instead of black, but I think it will do for a Halloween costume...

Monarch Butterfly Dress ~ Finishing the Bodice


Okay, so I tried to drape the bodice for the dress with one of the wings I already painted, but the fabric was sort of stiff from the paint and I just didn't like the way it looked.  It was all lumpy, so I think I am going to just finish off the bodice and leave it all black for now.  Once I finish painting the wings and put the skirt together, I will see how it looks and I may just paint a design on it to mimic what it would have looked like if I had draped one of the wings across the bodice, but we will just have to see what happens.  If your wings aren't as stiff as mine or you are just straight determined to have a wing draped over the bodice, here is draping tutorial that you can use to help.  The bodice of the butterfly dress is actually like a pleated drape (I guess that's what you would call it), so you would want to pull the fabric a little tighter than she does as you are draping. And of course if you need any help, just email me!  

Also, I saw this So-Soft Fabric paint at Hancock's fabrics the other day.  Unfortunately, they were out of the colors I needed and I don't think I have time to order them, so looks like I will just have to go with what I have, but if you haven't bought or opened your paints yet, you could definitely get these and would {theoretically} be able to drape the wing over the bodice since this one is supposed dry soft.

Also, if you don't have a dress form to drape on, just do like I do and safety pin the bodice around a pillow, then stuff the bra with socks...

Hopefully, when you really put the thing on your boobs won't be that lumpy!  lol


Yay!  Turns out I will be able to drape the bodice!  Read this post for more info, and look for the post very, very soon!

Thursday, October 13, 2011

Fashion & Flair Friday ~ Monarch Butterfly Dress, Part 3: Painting the Wings


Thanks Lelani & Mandy for featuring me!

Okay, so here goes the tutorial for painting the butterfly wings.  Unfortunately, the girl who was supposed to do it was unable to, but thankfully my grandma and grandpa helped me, and I think it came out pretty good.  So here goes...


Cut out the wings (check out this post for more info)


Transfer the pattern onto the fabric using carbon paper according to the directions on the package...btw  don't worry about transferring the little circles...just the main pattern, not the ones that are supposed to be white.

For the paint colors, I used gloss white, anita's metallic pure gold (it's a lite yellow gold), folkart metallic garnet red, and shiny orange and shiny red...I got all these at Hobby Lobby, but if you don't have one around or they don't have these specific colors, here's what I've found...The metallics look best on the fabric, but if they don't have the colors you need in metallic, get gloss/shiny. 

For the paint brushes, I used a one inch flat brush with stiff bristles and a half inch on for the white circles.

You will start out with the pure gold and garnet colors.  For the main pattern on the bottom of the wing, paint them with two thin coats of the gold and the main four at the top, two coats of garnet.  I found it easiest to just do it like you are coloring,  out line the part you are working on, then color it in.

Hold the brush like a pencil and sideways (not flat), and just stroke back and forth like you are coloring it in.

Also, when you are adding more paint, don't start right next to where your paint ended.  Leave a little space and blend the fresh paint to where the other paint ended.

Like this...


When you are done it should look like this...except the four big orange ones at the top should be the garnet color... I didn't realize to do this until after I was done but I think it is going to give a better color variation, and look much better. The smaller, lighter ones at the very top of the wing are going to be just orange, so be sure you don't put the garnet color on them.

Now you are going to mix the red and orange.  I did about 70% orange, 30% red, but just experiment until you get a color you like.  Then you are going to apply it on top of the gold and garnet in the same manner you did before.  Making sure you can see the gold and garnet colors through the red orange.

Like this...

And don't forget about the four smaller sections at the very top of the wing...I went over them twice.

Now for the white part, I used about a half inch flat brush.  Once I started painting I wasn't really happy with the white part (should I say the part of the pattern that was to be painted white) so I just sort of "winged it"...pun intended ; )

Basically, I followed the pattern for the larger white circles at the very top, but when I got to the side, I just made small ovals all down the side, and then, once I got to the bottom did a double row.  Try not to be to perfect.  Some of mine need a second coat, but I had run out of paint on my plate and dinner needed to be started, so I just went ahead and took pics, but ideally, you want them to be a bright white  with just teeny bits of the black showing through like the ones at the very top of my wing.

Well, hopefully that helps you guys...I'm not really a painter, so if I didn't cover anything or something isn't clear, please ask in the comments section so anyone else who needs help can benefit to.  And if you are a painter feel free to add any tips!  They would be greatly apprieciated!!!

Find the next post in this series here


Tuesday, October 11, 2011

Monarch Butterfly Dress update

Hey everyone so sorry if you are waiting on the rest of the posts for this dress sew along!  You can check out the first post here and the second post here.  I really do apologize it is taking so long.  When I started my new job it made my life so crazy and I am just finally getting settled in and back to a routine.  On the plus side, I am learning so much!  Being a self taught seamstress, there are just so many things you don't know, and it really was much harder to start than I anticipated.  Anyway, back to the dress, I also had the problem that the person who was supposed to do the painting tutorial for the wings was unable to do it, and I am not a painter by any means!  I have been trying to figure it out on my own to no avail, and then thankfully when I mentioned it to my grandma, she offered to help me...I completely forgot her and my grandpa used to do paintings and paint on t-shirts when I was younger!  So I am going over to her house  tomorrow and we will have the tutorial up by Thursday for painting the wings, draping the bodice by Saturday, and attaching the skirt will be up by next Wednesday.  If you are following along and need help please do not hesitate to email me, and once again so sorry it's getting finished up so late!

Saturday, October 8, 2011

Fashion & Flair Friday ~ Kate Quinn Piped Peter Pan Dress Knockoff


The good news:

I actually came close to posting Fashion & Flair Friday on Friday! Yay!!

The bad news:

My dress was an epic FAIL!!!

Okay, okay, so it's not that bad.  It's just too short. Luckily, I have a little extra fabric so I think I can make a hem facing and get a couple extra inches on it.  Then, it won't be so bad....or maybe I'll just put it with leggings???  We'll see...you guys know how slow I am at getting things done...leggings may be the only option for her ever actually getting to wear it!  lol

Sophie was filthy when I took this pic!  I didn't realize just how dirty she was until I pulled it up on my computer...and she's outside dirty once again, so I'm not even going to bother trying to take another one of her wearing the dress...

For this dress, I used Oliver + S' Jump Rope Dress Pattern.  I had been wanting to to try the "B" version ever since I made the first version last year. (see it here) So when I saw this Kate Quinn dress, I thought it would be the perfect opportunity to it out.  When you get you materials, you will need 3-4 packages of coordinating piping. 

So, it was pretty simple. I used the front and back dress pattern for view b and the sleeves from view a. For the belt loops I cut 2 - 15" x 1.5" strips, and for the belt, I cut two 3" x width of fabric strips.  (for any size past a 5t you may need to make the belt longer than the WOF.  As you can see it is just enough to fit Sophie)

I was in a hurry and after I cut out my pattern pieces, I realized that I had forgot to extend the placket and cut seams to put the piping down either side, but I didn't have enough fabric to re-cut, and no way  was I going to waste it just to add a couple pieces of piping and a longer placket...kwim?


But you can easily do this by tracing the front dress piece and cutting it straight down the center (where the fold is on my pattern piece TIP:  you want to bring the bottom of the armhole over to meet the center, NOT the bottom hem.), then add a 1/2" seam allowance to each side where you cut it.  And then when you cut the center front piece, don't cut it on the fold.  Cut it so that you have two pieces...so you would have four pieces total for the front of the dress. 

Then do the same for the back, but DO cut the center piece on the fold...so you will have three pieces for the back dress.

Next, when you cut the placket, cut two right plackets (the one with the straight bottom) instead of one right and one left, and extend them so that they are the same length as the center front of the dress.

Before getting started following the pattern instructions, you will want to stitch the front dress pieces back together adding the piping to the seams.  Do NOT stitch the center front together.  This is where the placket will be.  Repeat for the back dress piece.  You should have two front pieces and one back dress piece.  

Now you can get started following the pattern instructions.  I seem to have not put away the instructions when I was done and I can't find them anywhere in the mess that is my dining/sewing room, but I think I remember pretty well, so if something is out of order from what the instructions are in the pattern, follow that pattern just making the changes when you get to that section...

First is the collar.  The only change here is to sew the piping on before stitching the top collar to the bottom collar.

Next, for the placket, if you are extending it to the bottom of the dress, sew both sides on according to the instructions for the right placket (the one with the flat bottom on the wearer's left)

Now continue following the pattern until it is time to hem the sleeves and bottom.


Finish the raw edge then fold up 1.5" and press.

Open it back up and pin the piping so that the part you are going to stitch is right on top of the crease.

See how when I fold it the piping hangs just off the fabric...


When you get to the end curve the piping up and away from the raw edge.

It should look like this...

Now fold the hem back up along the crease and stitch in place...you should be able to see the piping along the bottom edge, but I forgot to take pics for this part and this was the closest pic I had to what it should look like...

Now, fold the bottom edge up (towards the RS of the dress) 3/4"; press and stitch in place.  You can either "stitch in the ditch between the piping and fabric with your machine or hand tack it...totally up to you...I use my machine cause well I'm lazy...if you look closely you can see a little spot where I wasn't quite "in the ditch", but oh well no one will see that under her arm!

Repeat these steps for the hem of the dress.


Now baste the piping to both the long edges of one of the belt loop strips.  Then, with RS together stitch the other one to it, leaving the short sides open; turn; press; and cut into four equal lengths; stitch 2 in front and two in back according to the pattern instructions (these will be under the a version)


Repeat the same steps for the belt except you will stitch all the way around, leaving about a 4" opening to turn it RS out; press; stitch opening closed using a ladder stitch.

I clip my piping at the corners to make it easier to bend.


And that's it!  Hope yours comes out long enough so that your little one can wear it!  And I would love to see pics!!


Linked to:

Thursday, October 6, 2011

A very late Fashion & Flair Friday ~ Monarch Butterfly Dress Knockoff Part 2


Okay guys I am sorry I have been such a sucky blogger lately!  I ended up sticking with my alterations job...when I went to talk to the owner of the shop, she asked if I would try to stick it out if she made it so I only had to go once or twice a week, and I agreed, and I am really loving it!  But between that and homeschooling and helping my sisters get ready for homecoming last week...I just have been a really aweful blogger!  So, so very sorry to those of you that were waiting on this post!  But, here it goes...finally!  ; )

Find part 1 and the skirt pattern here

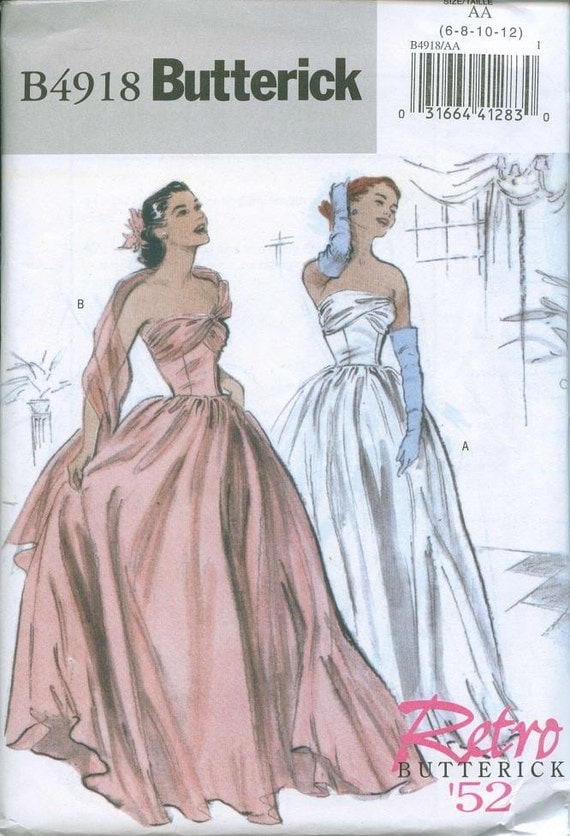
Butterick 4918 Retro Dress Pattern 1952 Size 6-12 EVENING GOWN Prom Formal Full Skirt

I am using Butterick 4918 for the bodice because of it's lined, boned bodice...not to mention I already had it in my stash, but any strapless dress pattern you have will work as long as the bodice is a separate pattern piece from the skirt.  (I linked to ebay, but you should be able to find this pattern anywhere butterick patterns are sold...it's a reprint of one of their vintage patterns.)  If the pattern you are using doesn't have a lining, just cut out two bodices.

I am going to walk through what I did, but if you are using a different pattern and have questions, feel free to email me or leave a comment, and I will do my best to help you.

You will need pieces 1, 2, 7, and 8.  According to my measurements, for this pattern, I am an 6 in the bust and a 12 in the waist, so to keep from having to do a ton of taking in, I folded the pattern piece so that the top is a size 6 and the waist is a size 12.

Like this...


I wanted the waist to be lower so I cut my pieces about 2" longer and kicked them out a bit to account for my hips...

I only did this on the side pieces, not the center front and center back bodice pieces...this way the seams should lay straight when it's worn.


Now remember I mentioned that you should use a higher quality broadcloth?  Here's why...see how you can see through all the pieces except the front bodice piece??  That's because my local Joann's is the only place that carries thicker broadcloths and they are closing and had none left, so I had to buy the cheaper stuff, so now I am having to double it up...major pain!!!  I only did it for the actual bodice...This is the lining piece so I wasn't worried about it, but I had cut an extra front so I just went ahead and added it so you could see the difference...


After that just construct the top according to the pattern instructions...here's a few tips...

When you sew the side front pieces to the center front piece, sew them with the side pieces down because the side pieces will lay flat once pinned but the center front will not...

See the pucker?  If this piece is on top you can adjust the fabric to make sure you don't get any puckers in your seam...fyi...same goes when you are sewing a sleeve or anything else that has a curve...make sure to put the pattern piece that stays flat on the bottom, so you can adjust the fabric and keep from getting puckered seams.

Once you have it all sewn together, it should look like this...


Before I add the boning to the lining, I press the seam allowance up, and cut them that length, not the length of the entire seam as the pattern tells you to do.

Also when you put the boning in the bust, make sure you are pushing it out and pull the fabric taught when you are stitching to prevent puckering.

I also like to flip it over and check to make sure the seam is smooth.

Then, use a zipper or piping foot to stitch the boning to the lining.  I think a piping foot works best because a zipper foot has that little lip that the zipper passes under and my boning casing kept getting caught on it.

Next up...painting the wings!  

I had someone who was supposed to do a tutorial, but I haven't heard anything, so I am going to get my grandma to give me some tips and I will get the post up asap so we can start knocking out those wings!!! 

Go here for the next post in this series.

Related Posts Plugin for WordPress, Blogger...